DIY Nails at Home: The Complete Guide to Salon-Quality Nails Without Leaving Your Couch
Mira

DIY Nails at Home: Save Money, Stay Stylish & Get Salon Results
If you’ve ever left a nail salon thinking, “That looked great… but why was it so expensive?” — you’re not alone. More and more people in the US are switching to DIY nails at home, and honestly, it’s not just about saving money anymore.
It’s about freedom, creativity, and convenience.
In this guide, you’ll learn how to do your nails at home like a pro — plus where to get affordable, high-quality press-on nails that actually look salon-made.
Why DIY Nails at Home Is Trending in 2026
Doing your nails at home used to feel like a compromise. Now? It’s a lifestyle.
Here’s why it’s blowing up:
- 💸 Save $50–$100 per salon visit
- ⏰ No appointments needed
- 🎨 Switch styles anytime you want
- 🏠 Comfort of doing nails at home
- ✨ Press-on nails now look incredibly realistic
With TikTok and Pinterest trends constantly changing, people want nails that match their mood — not just something they’re stuck with for 3 weeks.
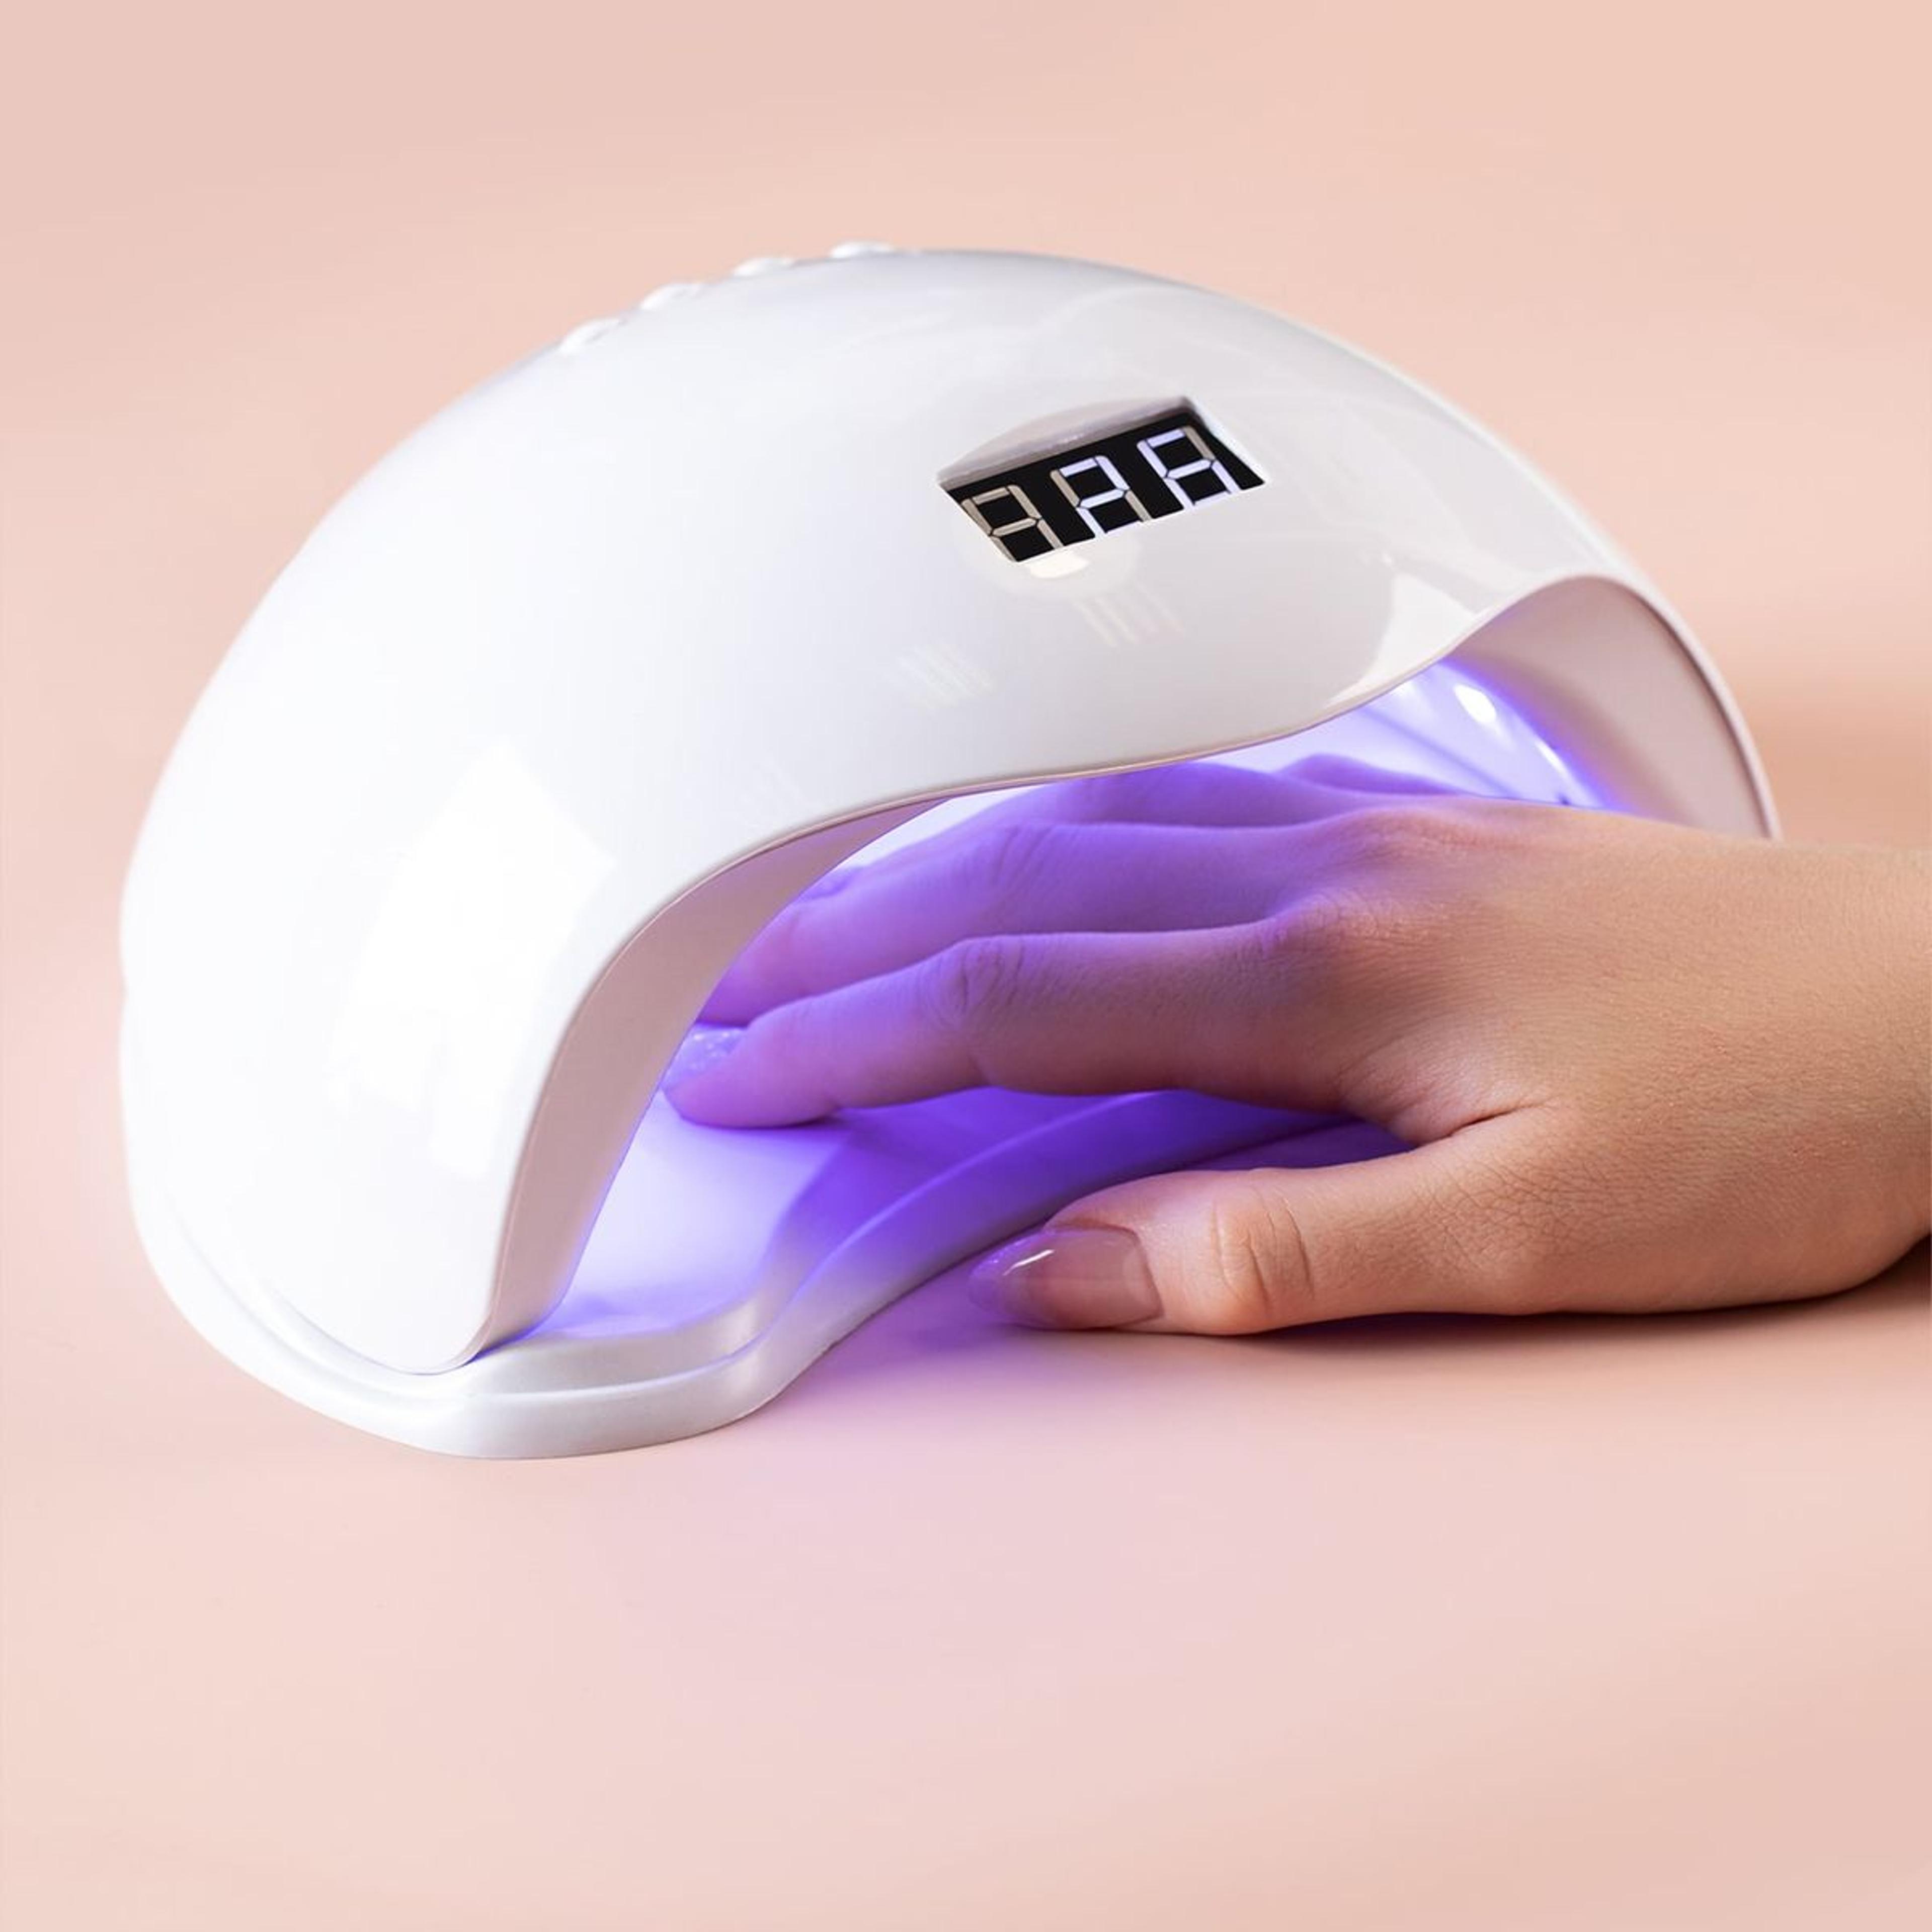
What You Need for DIY Nails at Home
You don’t need a full salon setup. Just a few essentials:
Basic Nail Kit:
- Nail file & buffer
- Cuticle pusher
- Nail glue or adhesive tabs
- Alcohol wipes (for prep)

Optional (for better results):
- UV lamp (if using gel)
- Nail dehydrator / primer
- Top coat for extra shine
But here’s the secret most beginners miss…
👉 You don’t have to build nails from scratch.
The Easiest Way: Press-On Nails (Beginner Friendly)
If you want instant results, press-on nails are the fastest way to get salon-quality nails at home.
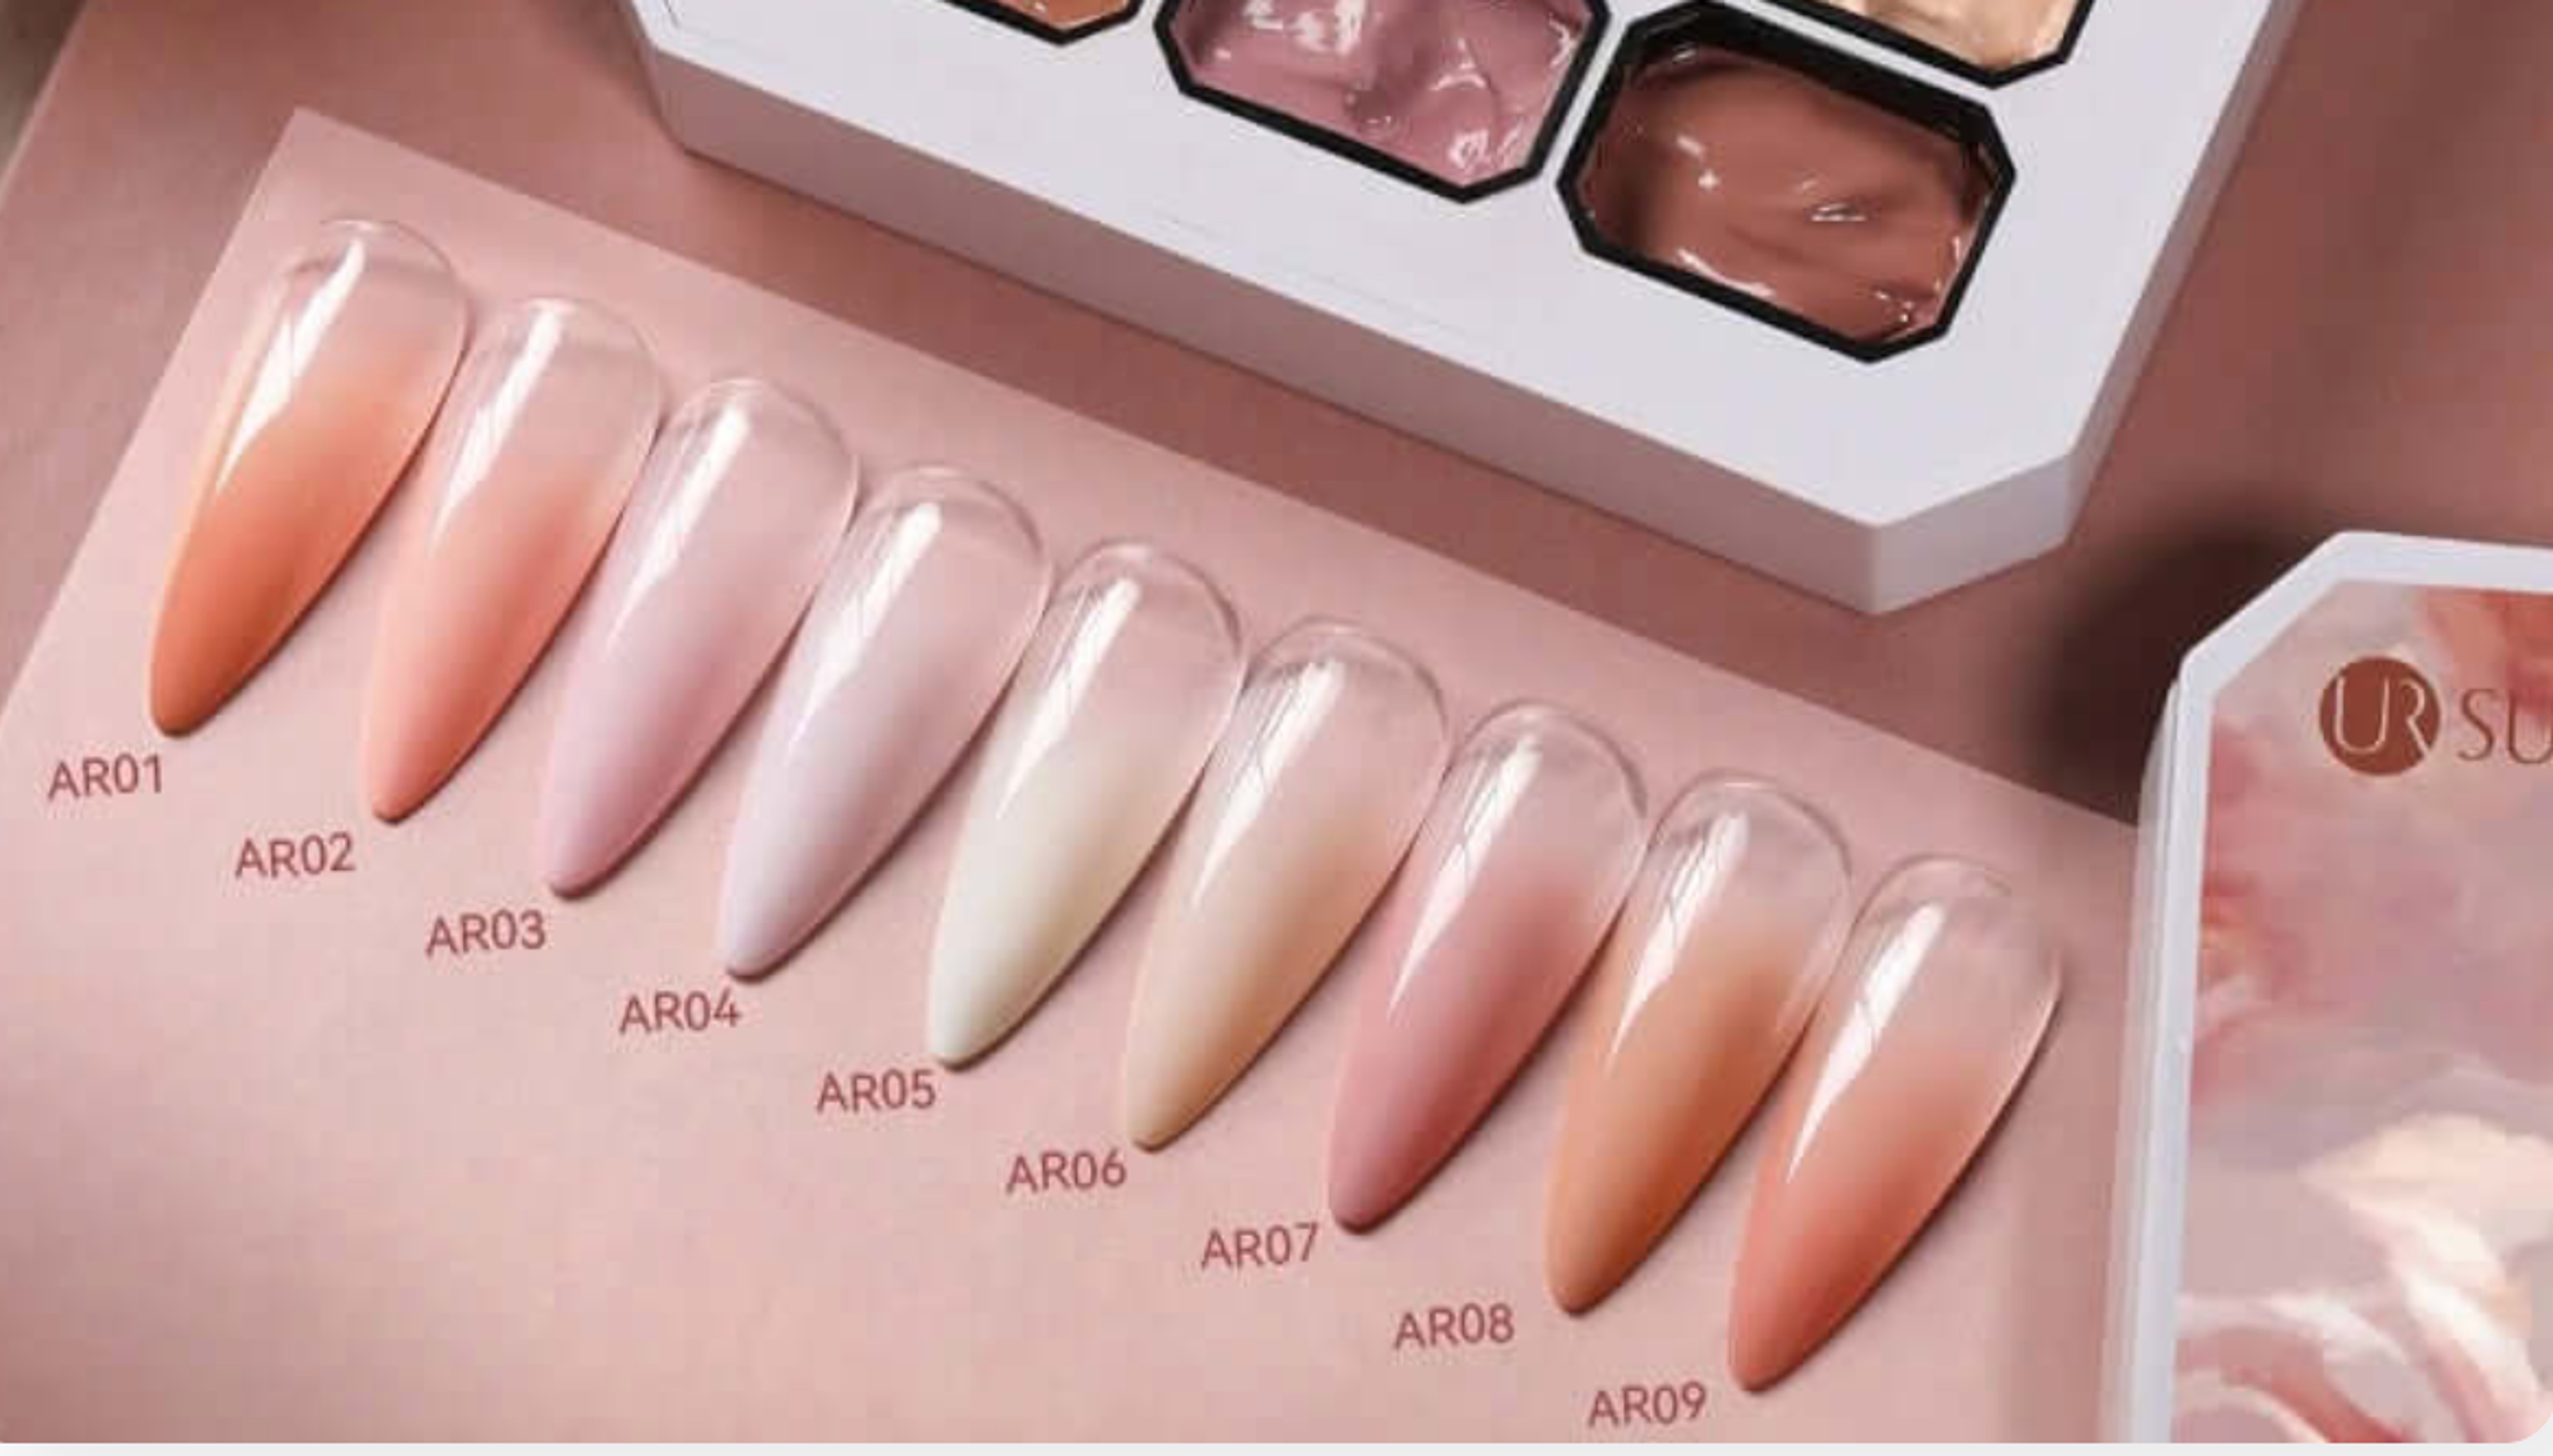
Modern press-ons are:
- Lightweight
- Reusable
- Pre-designed (no painting needed)
- Super easy to apply (under 10 minutes)
Perfect for:
- Busy schedules
- Beginners
- Trend lovers who change styles often
Where to Buy Trendy Press-On Nails (Affordable & High Quality)
If you're looking for cute, trendy, and affordable nails, check this out:
👉 Shop here: shop now
And don’t forget to use your exclusive coupon code:
🎁 Use Code: YENDUONG for discounts
These nails are perfect for:
- Minimalist styles
- Korean-inspired designs
- Cute & seasonal trends
- Everyday wear or special events
Step-by-Step: How to Apply Press-On Nails
Follow this simple routine for long-lasting results:
Step 1: Prep Your Nails
- Wash hands
- Push back cuticles
- Lightly buff nail surface
- Clean with alcohol
Step 2: Choose the Right Size
Match each press-on nail to your natural nail size.
Step 3: Apply Glue or Adhesive Tabs
- Glue = longer wear (1–2 weeks)
- Tabs = temporary (1–3 days)
Step 4: Press & Hold
Press firmly for 20–30 seconds.
Step 5: Shape & Finish
File edges if needed and apply top coat for extra shine.
Pro Tips for Salon-Like Results
- ✔ Always prep nails properly (this is 80% of success)
- ✔ Avoid water for 1–2 hours after applying
- ✔ Use a top coat to make nails last longer
- ✔ Store nails to reuse later
DIY Nails vs Salon Nails: Which Is Better?
FeatureDIY NailsSalon NailsCostLowExpensiveTimeFastTime-consumingFlexibilityHighLowSkill RequiredBeginner-friendlyProfessional
👉 For most people, DIY wins — especially with high-quality press-ons.
Final Thoughts
Doing your nails at home isn’t just a trend — it’s a smarter way to stay stylish without overspending.
With the right tools and good-quality press-on nails, you can:
- Change your look anytime
- Save hundreds of dollars
- Enjoy salon-quality results at home
👉 Ready to upgrade your nail game?
Shop here: https://www.nailsala.com/?ref=xukardft
🎁 Use code YENDUONG to get your discount


